Set up Borg Backup on Synology DiskStation
It’s possible to install Borg Backup on a Synology NAS device and use it for offsite backups to BorgBase.com. The following steps don’t require terminal access and will set up a new regular task in the DSM web interface.
An earlier version of this tutorial described a setup using only Borg. Since 2020, Borgmatic is included in the Synology Borg package, which makes setup much easier. To avoid using the command line, this tutorial puts the SSH key and Borgmatic config into a hidden share on the data directory. Alternatively these files could also kept under /root/.config/borgmatic/config.yaml and /root/.ssh.
Step 1 - Install Borg Backup and Borgmatic
SynoCommunity provides an updated Borg package for DSM. It also includes Borgmatic, which is a wrapper around Borg to manage configs, pruning and repo checks.
To install it, follow the steps outlined on their website or below:
- Log into the web interface
- Choose Package Center
- Go to Settings > Package Source and choose Add
- Enter
SynoCommunityas name andhttp://packages.synocommunity.comas address
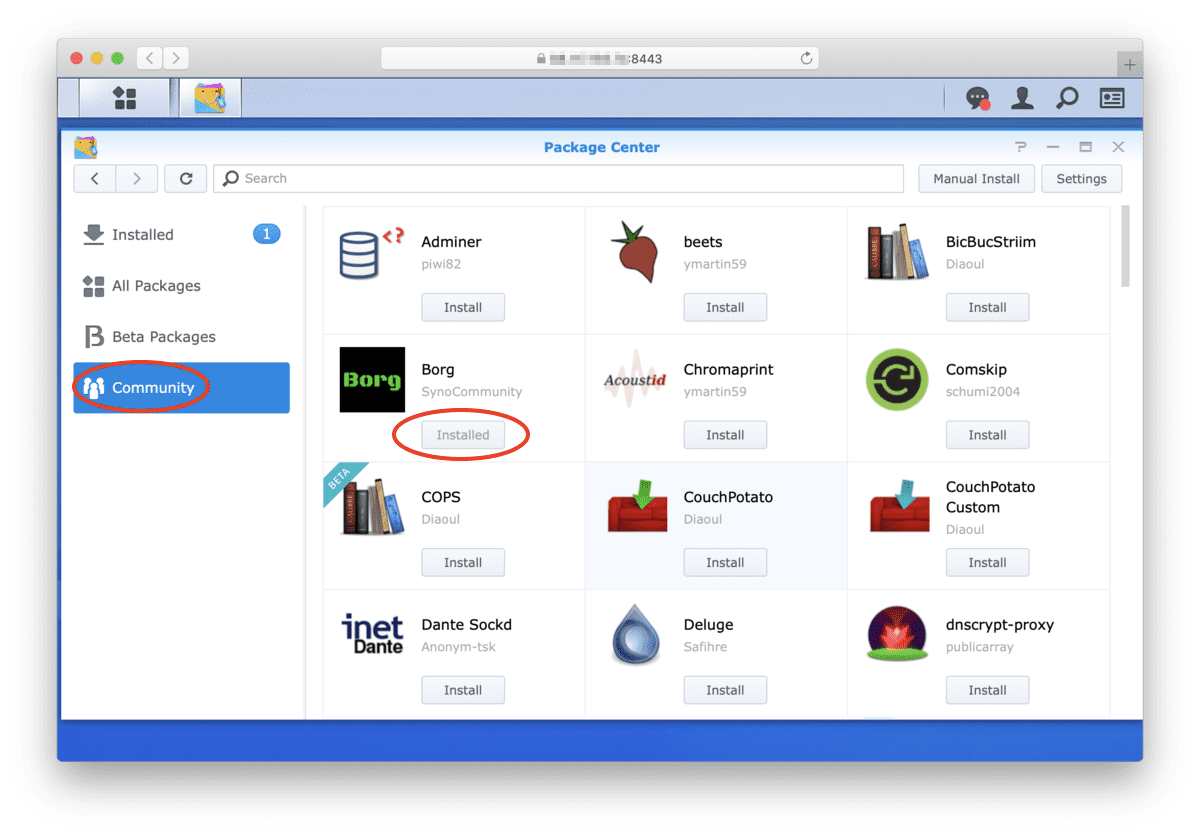
You should now see a new Community entry on the left side that should have Borg listed as package. Simply click Install to install Borg together with Python 3.
Step 2 - Create Hidden Shared Folder for Borg Config Files
Now, let’s add a new hidden share to have easy access to Borg config files.
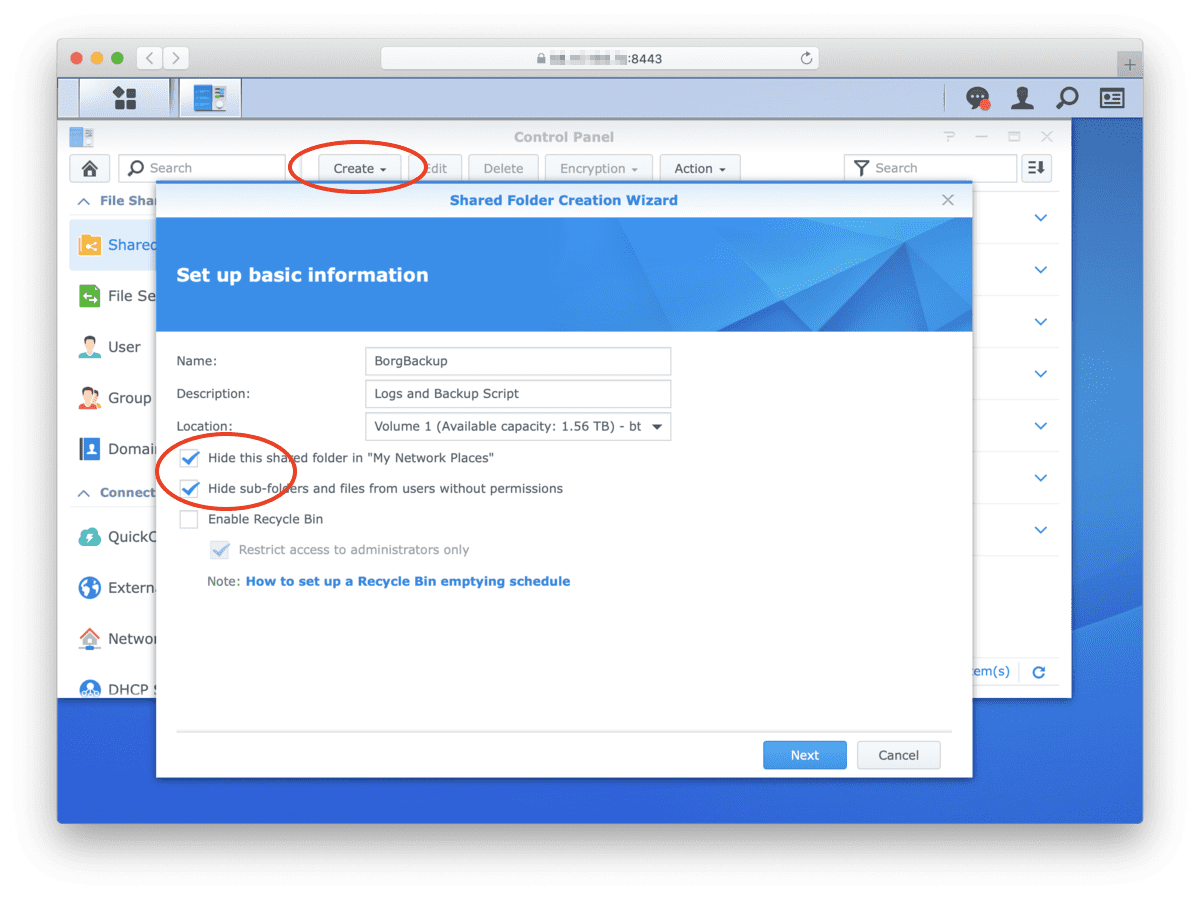
- Open the DSM Control Panel and choose Shared Folder
- Click Create and enter a name, description and choose to hide the folder. We also won’t need the recycle bin.
Step 3 - Create SSH Keys
Next, create a new private key for the Synology NAS and place it in the folder. You can either create the key on the device itself, by logging in via SSH (advanced option) or just create it locally and copy it over.
$ ssh-keygen -f ./id_synology
You will end up with two files: The private key, id_synology and the public key id_synology.pub. Copy the private key to the new BorgBackup shared folder on the DSM and add the public key to your BorgBase.com account.
Step 4 - Add Borgmatic Config
Next, add a Borgmatic config file in the shared folder created above. You can copy a template from the BorgBase web interface under Setup or from Borgmatic’s website. A minimal example would be:
location:
    # List of source directories to backup.
    source_directories:
        - /volume1/data
        - /volume1/more-data

    # Paths of local or remote repositories to backup to.
    repositories:
        - xxxxx@xxxxx.repo.borgbase.com:repo

storage:
    # Point to your private key
    ssh_command: ssh -i /path/to/private/key

    # Add passphrase used during repo init
    encryption_passphrase: "my-secret-passphrase-8859849"

retention:
    # Retention policy for how many backups to keep.
    keep_daily: 7
    keep_weekly: 4
    keep_monthly: 6

consistency:
    # List of checks to run to validate your backups.
    checks:
        - repository
See here for all available options. You will need to adjust at a minimum:
- Folders to back up under
source_directories - Path to private SSH key under
ssh_command - BorgBase repository URL to use under
repositories. It’s also possible to use multiple repos to achieve additional redundancy. - Add the encryption passphrase used during repo initilization under
encryption_passphrase
Last, save the contents of the above file as e.g. borgmatic.yml.
Step 6 - Add Backup Task
In this step we will add a daily task to create a new Borg archive. This is all done in the web interface and you can choose all kinds of daily, weekly or monthly backup frequencies.
First return to the Control Panel, enabled switch to Advanced Mode in the top-left and open Task Scheduler
Then Create a new Scheduled Task and choose User-defined script 
In the next screen, you can enter any name for the task. The user should be root, so it has full access to all files. The settings under Schedule can be adjusted any way you need them.
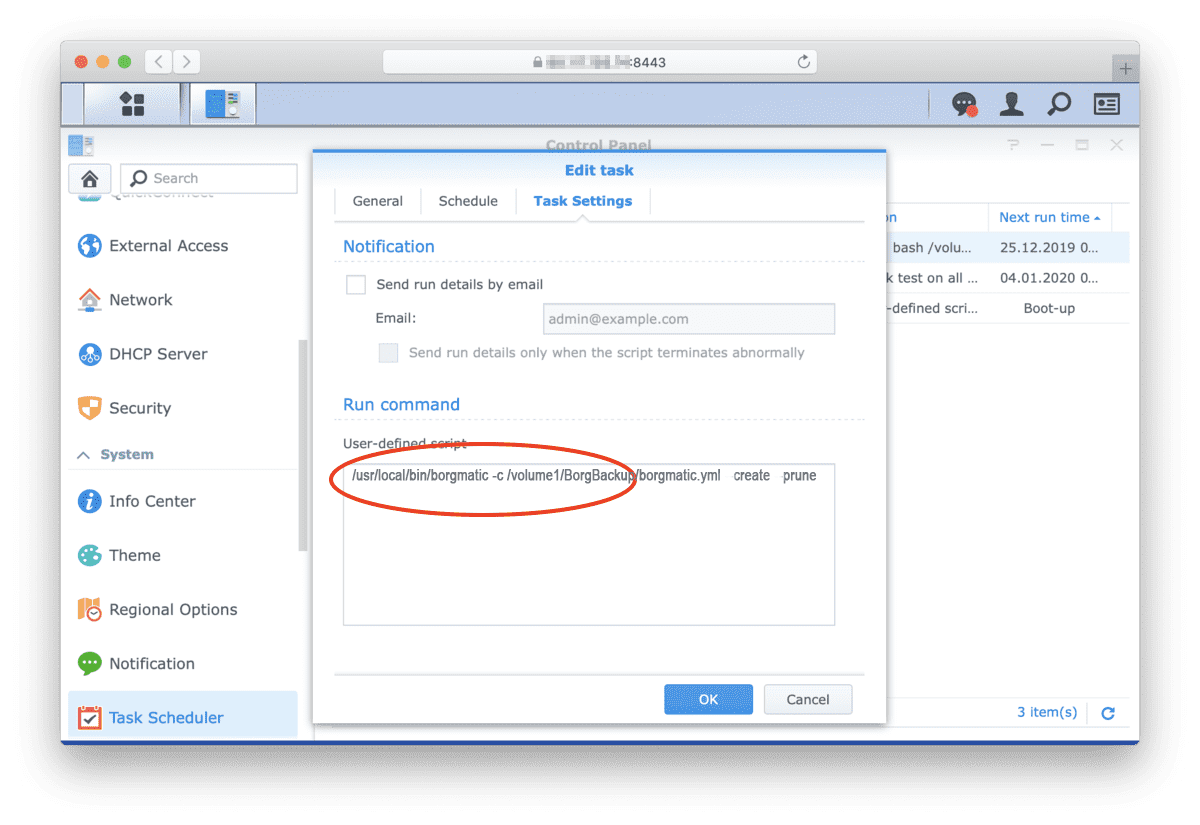
Add the path of your Borg folder and backup script under Task Settings. E.g.
/usr/local/bin/borgmatic -c /path/to/borgmatic.yml create prune
To regularly verify the integrity of your backups, you can add a monthly task for repo-checking: (please don’t do daily checks, as it puts a lot of load on our servers)
/usr/local/bin/borgmatic -c /path/to/borgmatic.yml check
Initialize Repository: If you are using a brand new repository, you need to initialize it first. This can be done via Borgmatic and it will use the config you added above. Simply run the below command either from the command line or as one-off task under Scheduled Tasks
/usr/local/bin/borgmatic init -e repokey-blake2 -c /path/to/borgmatic.yml
That’s it. Now you are ready to run the backup script. To trigger a manual test run, select the new task and click the Run button. You should see increased CPU usage and some upload activity in the resource monitor widget. If there are any errors, you will find them in the shared folder in a log file.
Conclusion
Now you have an efficient offsite-backup of your essential data with the added benefit of having everything integrated and logged in the web interface.
As always, if you have any additions or questions regarding this guide, feel free to open an issue or pull request in the Github repo or shoot us an email to hello@borgbase.com.